






Every Halloween I used to spend forty-five minutes hot-gluing a wig cap while my friends were already halfway through their first drink. Never again. The rule I set myself three years ago: own hair only, look identifiable from across a dim, crowded room, and be able to wash everything out before midnight if I feel like it. These thirteen halloween hairstyles all pass that test. Some take ten minutes. Some take thirty. None of them require anything that isn’t already in your bathroom cabinet.
Your Night, Your Decade — Jump to the Look
- The Beehive — reads instantly, needs height
- The Finger Wave — 1920s glamour in 20 minutes
- The Victory Roll — wartime pinup, strong silhouette
- The Bouffant — 1960s party queen, no teasing comb required
- The Farrah Flick — feathered and unmistakable
- The Old Hollywood Wave — red carpet, one side draped
- The Crimped Zigzag — 1980s in a single glance
- The Space Bun Pair — Y2K, reads from the back of a room
- The Grunge Half-Up — 1990s in thirty seconds
- The Pin Curl Set — 1940s texture that holds all night
- The Poodle Ponytail — 1950s sweetness, surprisingly quick
- The Disco Puff — Saturday Night Fever, zero apology
- The Side-Swept Flapper Bob — 1920s, bangs included
1. The Beehive — reads instantly, needs height
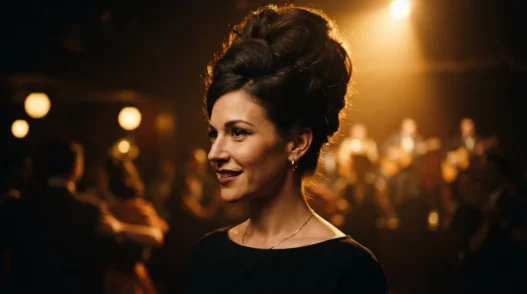
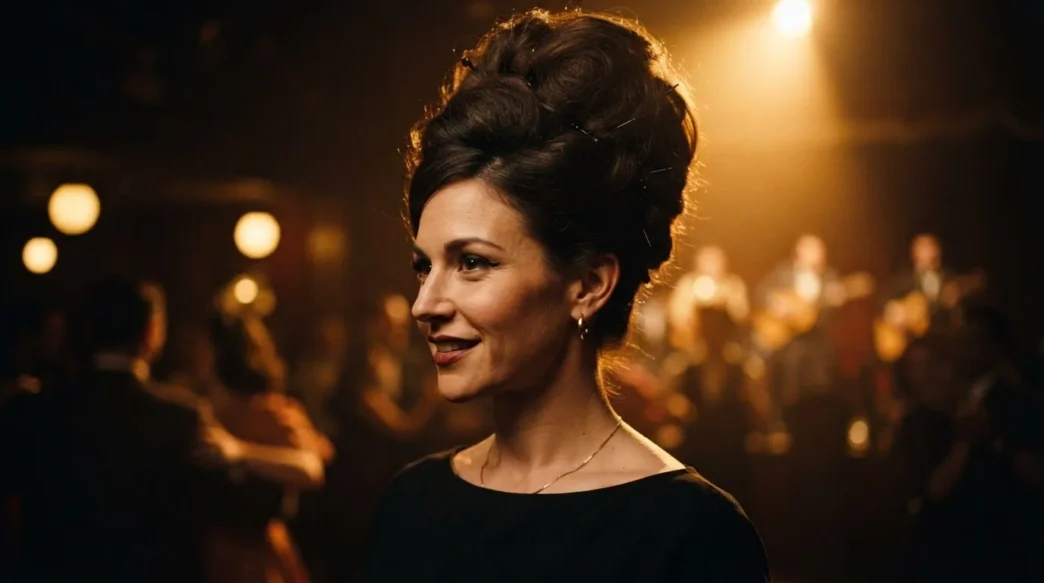
Era it signals: 1960s. Specifically Ronettes, Amy Winehouse tribute, haunted prom queen — the decade is irrelevant because the shape alone does the work.
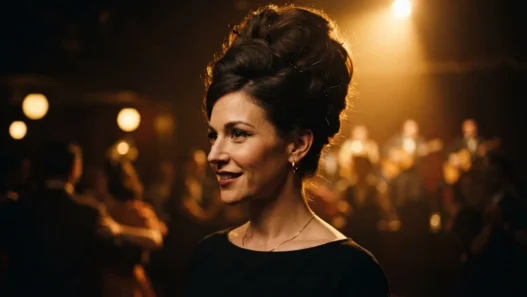
The beehive is the one halloween hair look where you genuinely cannot fail to be recognised. Anyone who sees that vertical silhouette from across a dark room knows exactly what they’re looking at. The shape is the costume. Everything else is just makeup.
What it needs: A rat-tail comb, strong-hold hairspray, and either bobby pins or a foam pad to build height. Temporary black hair spray (the cheap supermarket kind) adds theatre but is completely optional. If you’re going full haunted prom queen, a single fake spider pinned into the crown costs about two pounds and reads brilliantly under dim lights.
Time: 20–25 minutes once you know what you’re doing. First attempt, allow 35.
Getting it out: Hairspray dissolves in warm water. Soak the updo in the shower for two minutes before you touch it, then condition and comb through. No damage if you haven’t used wire pins close to the root.
2. The Finger Wave — 1920s glamour in 20 minutes
Era it signals: 1920s flapper. Jazz club. Silent film star.
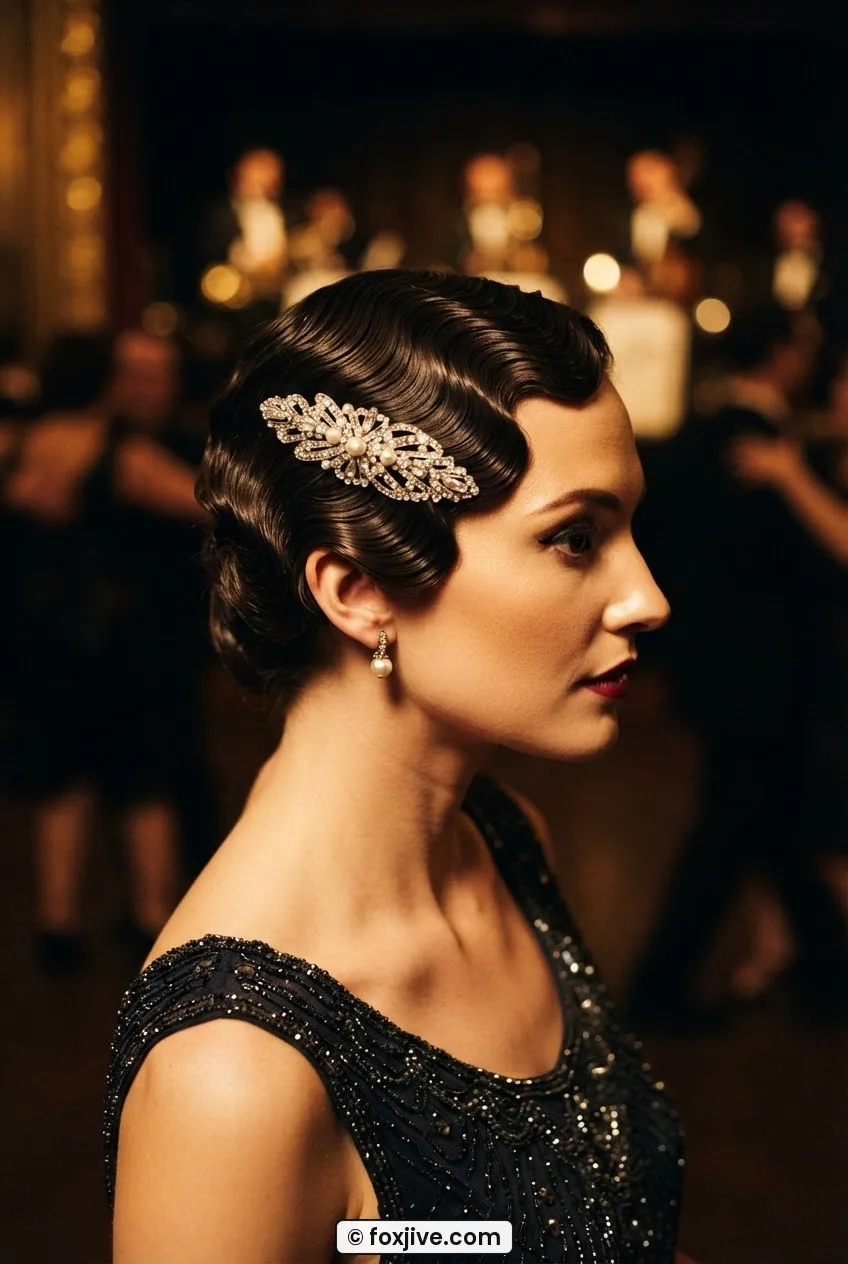
Finger waves look incredibly difficult and take maybe twenty minutes once you’ve watched a single tutorial. The S-curve pattern is genuinely iconic — people at a party will stop mid-sentence when they see it. Works best on shorter hair or a bob, but medium-length hair is fine if you pin the ends up into a low chignon.
What it needs: Wave gel or a strong styling mousse, a fine-tooth comb, and patience in three-inch sections. Pin in place while wet, let it set for ten minutes, then remove the pins gently. A small jewelled clip or a feather pin at the temple locks in the 1920s reference immediately. You can read more about achieving classic finger waves if you want a technique breakdown before you start.
Time: 20 minutes setting, 10 minutes drying with a diffuser.
Getting it out: Just wash. Gel and mousse leave zero residue after one shampoo. Your hair will be back to normal before the hangover hits.
3. The Victory Roll — wartime pinup, strong silhouette
Era it signals: 1940s. Pinup. Rosie the Riveter. Any rockabilly-adjacent costume.
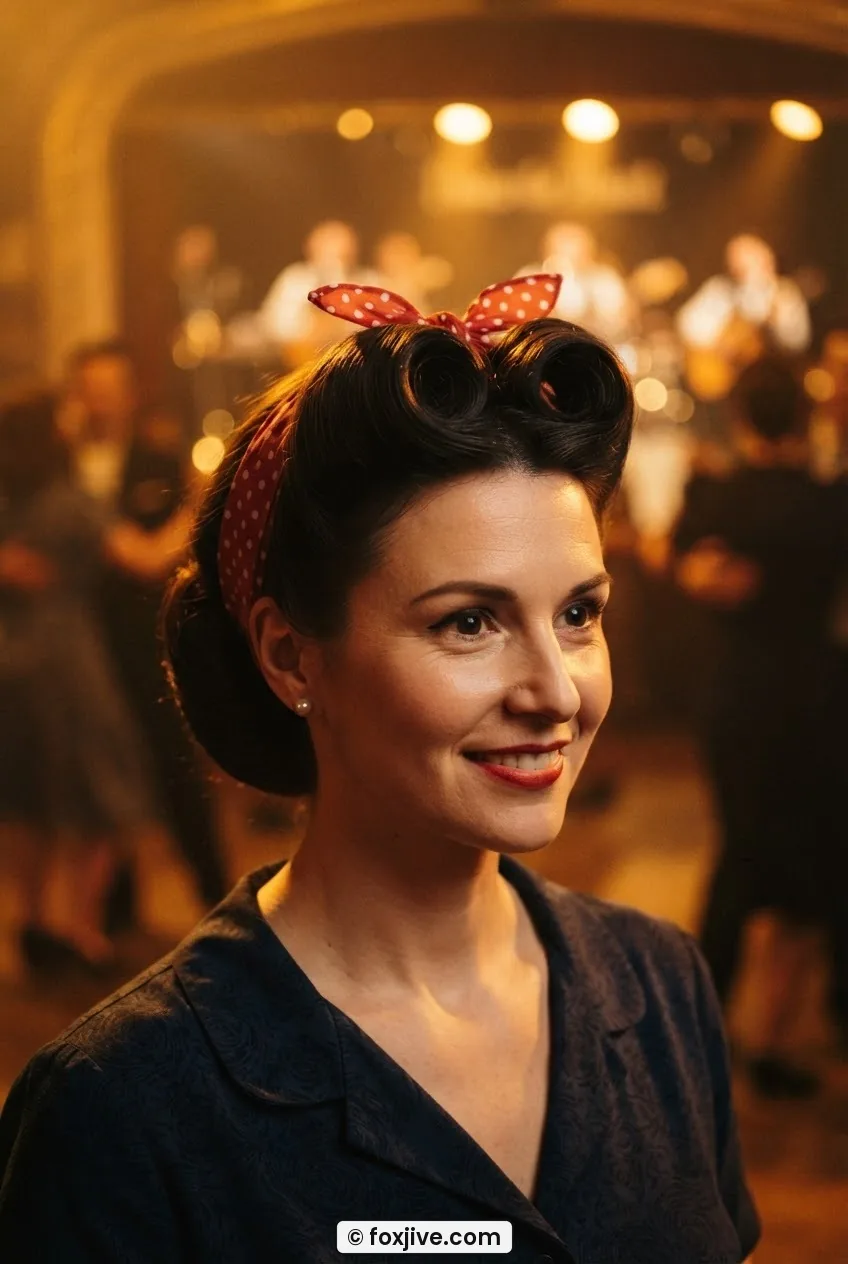
This is my personal obsession and it’s been the subject of half the posts on this site. The victory roll is a rolled tube of hair sitting at the front hairline, usually in pairs — one above each temple — and it is immediately legible as 1940s from ten feet away. It telegraphs era, it telegraphs effort, and it looks genuinely spectacular. I’ve rounded up 9 victory roll ideas ranked by how long they take if you want to match the variation to your available time on the night. And if you want to go deeper into the technique, the whole victory rolls category is worth a scroll.
What it needs: Sectioning clips, a tail comb, medium-hold hairspray, and a few bobby pins. A bandana tied around the crown converts this into Rosie instantly — red polka dot if you can find one.
Time: 15–20 minutes for a clean pair of rolls.
Getting it out: Unpin everything, spritz with a detangling spray, comb through root to tip. Done. No damage from bobby pins as long as you’re not forcing them through knotted hair.
My personal pick for the night? The victory roll, every single time. I’ve done it in the back of a taxi with a comb and a pocket-sized can of hairspray and it still looked intentional. There is no other halloween hairstyle that gets more immediate recognition for the time investment involved. People who have never thought about the 1940s in their lives will say “oh, pinup girl!” within seconds. That’s the whole job done.
A Tutorial That Actually Helped Me Perfect These
4. The Bouffant — 1960s party queen, no teasing comb required
Era it signals: Early 1960s. Jackie Kennedy. Mad Men party. First Lady energy.
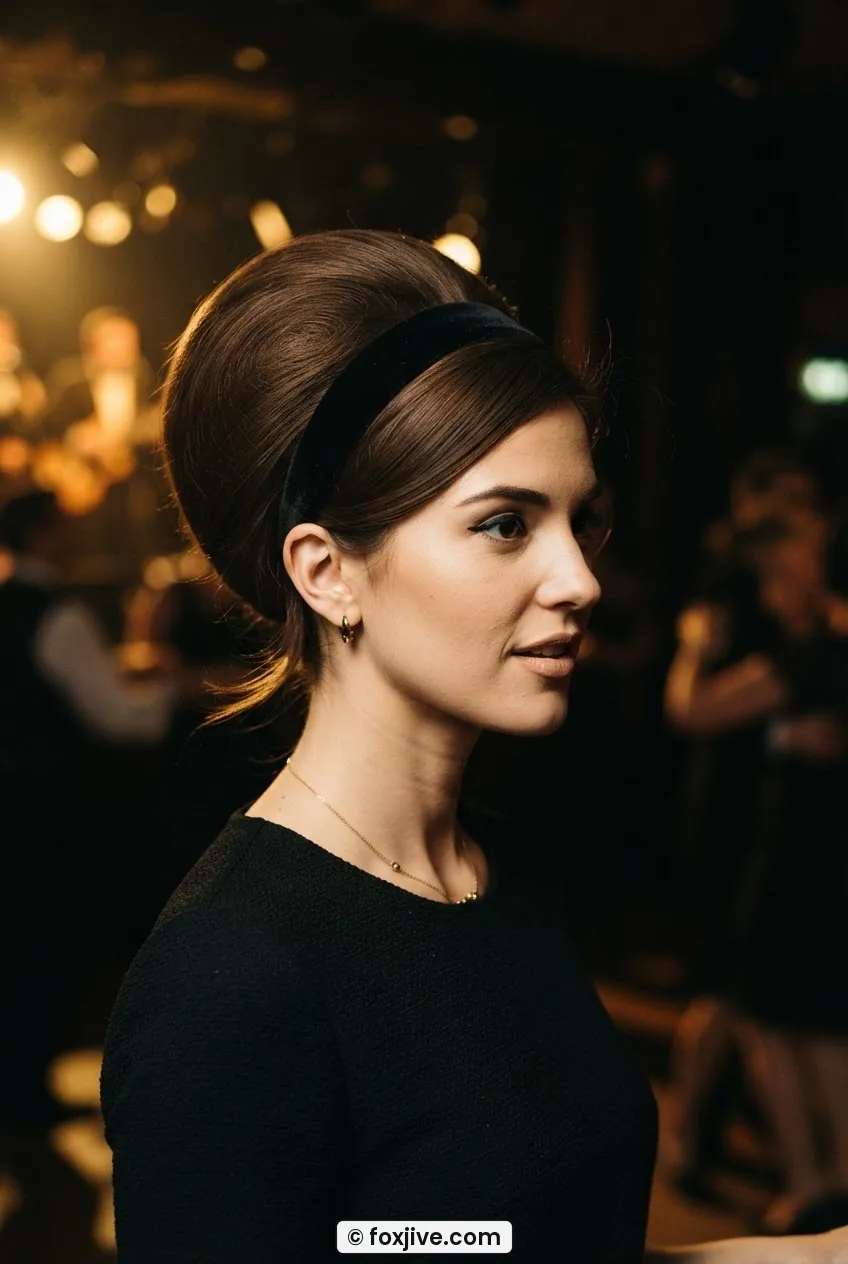
The bouffant is the beehive’s slightly more restrained sister — rounded rather than towering, with the volume sitting around the crown rather than shooting straight up. It’s softer but still unmistakably sixties. And honestly? It’s easier to do on fine or medium hair than the full beehive because you’re building width rather than extreme height.
What it needs: Backcombing at the crown (yes, you do need to backcomb slightly, but not aggressively), a light-hold spray to set the shape, and a few pins to secure the ends into a smooth finish at the nape. A velvet headband or a single statement clip pushes it straight into 1960s territory. White gloves are a nice touch if you’re committed to the bit.
Time: 20 minutes.
Getting it out: Condition heavily before shampooing if you’ve backcombed significantly. Comb through section by section with a wide-tooth comb under running warm water. Your hair will thank you for the extra few minutes of care.
5. The Farrah Flick — feathered and unmistakable
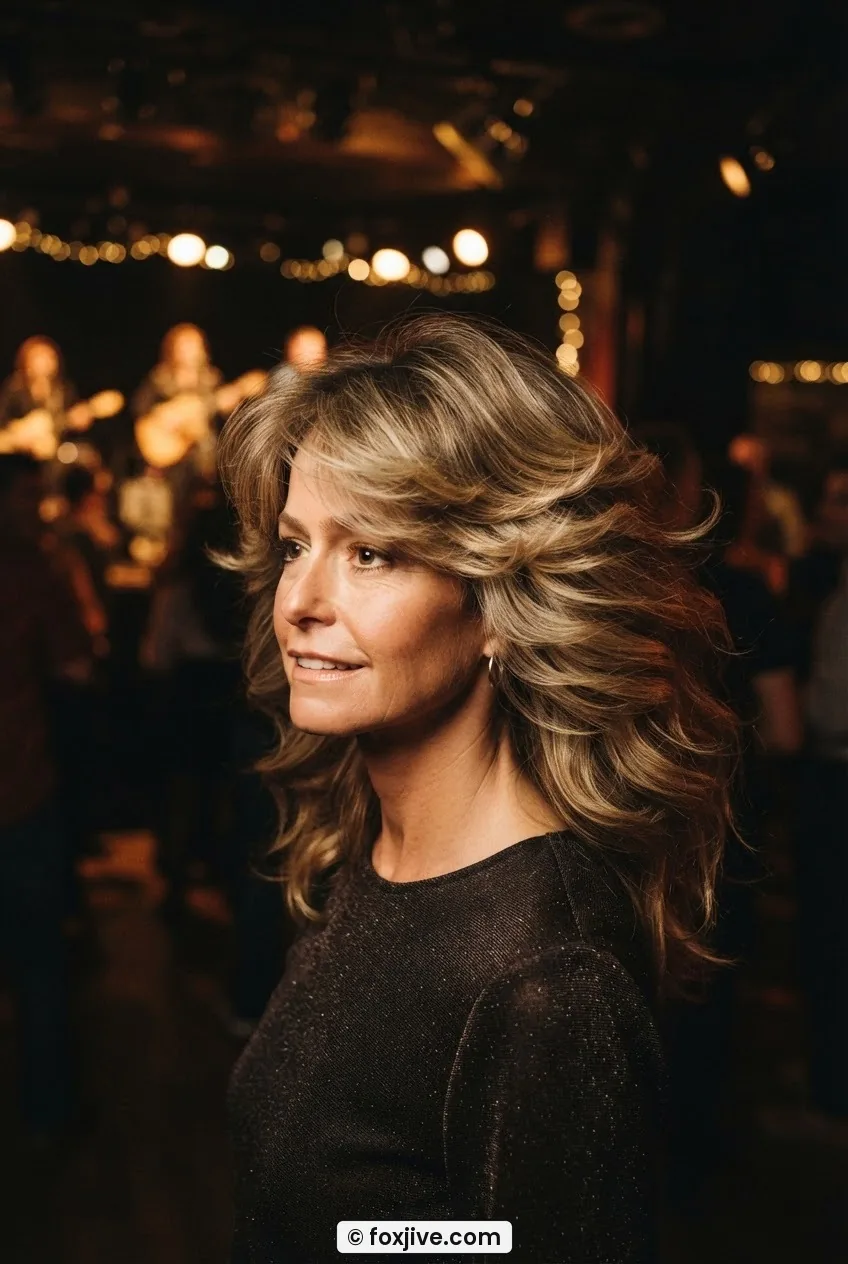
Era it signals: Late 1970s. Charlie’s Angels. Roller disco. Sun-bleached California.
You know exactly what this looks like. The big wings sweeping back from a centre or side parting, layered and feathered, almost alive with movement. It’s one of those halloween hair styles that works brilliantly for women with longer layers because you’re just exaggerating what your hair already does. A round brush and a blow-dryer is your whole toolkit here — maybe a little dry oil for shine.
What it needs: A large round brush, a concentrator nozzle on your dryer, and a light hold spray to keep the wings in place. For full effect, a pair of oversized hoop earrings and a white wide-collar blouse does the character work for you. Temporary golden tint spray can warm up dark hair and push the sun-kissed 70s vibe further, but it’s absolutely not necessary.
Time: 25–30 minutes for the blow-out. The technique is specific but not difficult.
Getting it out: It’s just a blow-dry style. Wash and it’s gone. Zero product build-up if you’ve used a light spray rather than a wax.
6. The Old Hollywood Wave — red carpet, one side draped
Era it signals: 1930s–1940s. Silver screen. Film noir. Femme fatale in a fur coat.
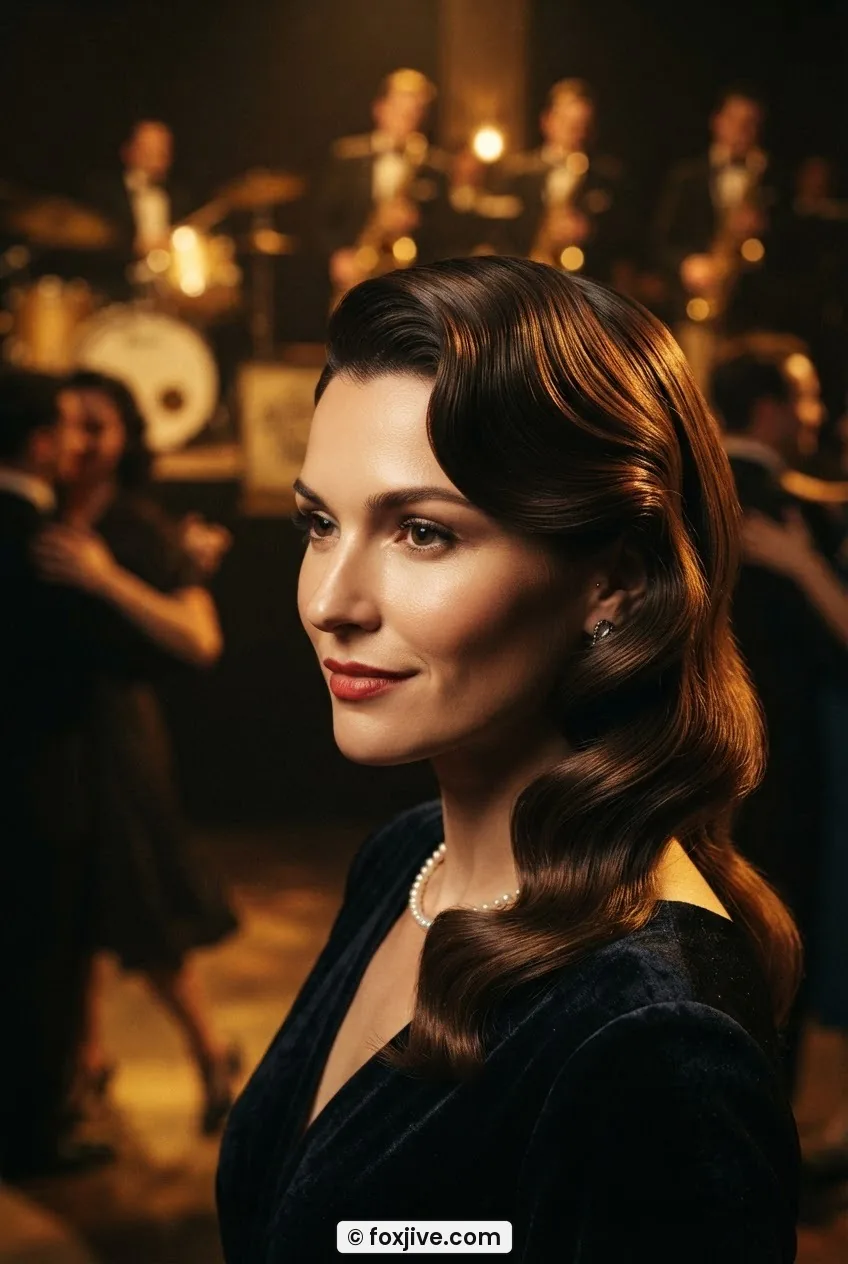
One deep side parting. One dramatic wave that sweeps across the forehead and drapes over the shoulder. The other side pinned close to the head. That’s the whole look — and yet it reads as such deliberate, specific glamour that people assume you spent an hour on it. You probably spent twenty-five minutes. This works on shoulder-length or longer hair and it genuinely does not require a waving iron if you use a wide-barrel curling wand and brush through the curl while it’s still warm.
Look at how she’s wearing hers in this photo — that single draped wave over the left shoulder is doing all the storytelling. The contrast between the sleek temple pin on one side and the soft wave on the other is exactly the visual tension that makes this style feel like it’s from a different era entirely.
What it needs: A wide-barrel wand or hot rollers, a boar-bristle brush to smooth the wave, and strong-hold pins on the tight side. Red lip. Done. Deep berry or classic red — that is the only makeup instruction this look needs.
Time: 25 minutes.
Getting it out: Standard wash. The pins leave no trace. Condition as normal and your wave disappears.
7. The Crimped Zigzag — 1980s in a single glance
Era it signals: 1980s. Music video. Power shoulders. Every teen movie set in that decade.
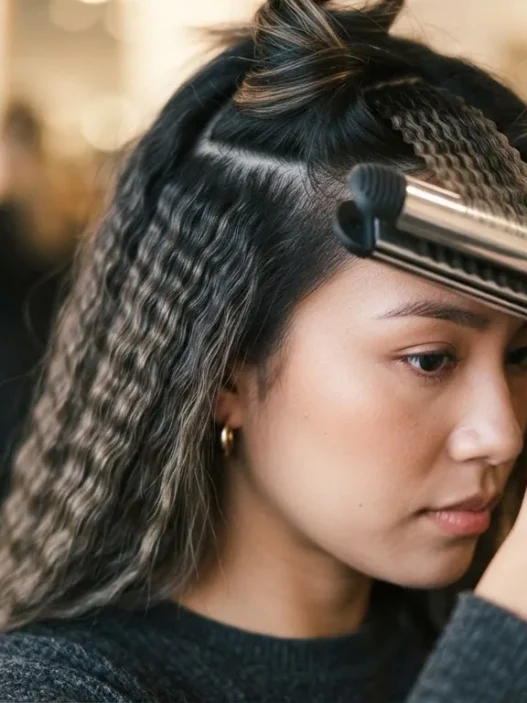
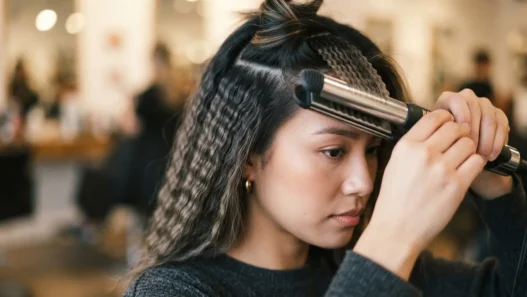
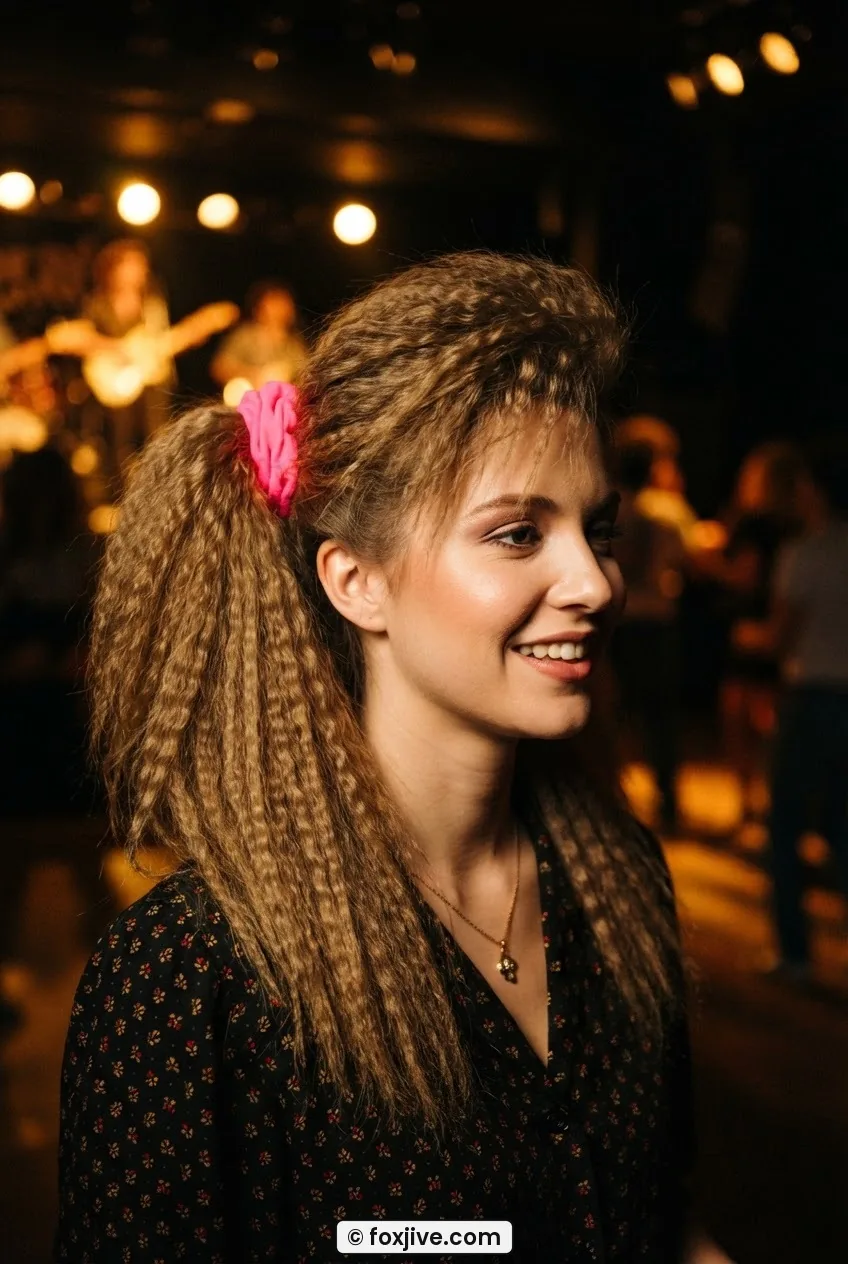
A crimping iron is about twelve pounds and crimped hair is one of the most immediately readable decade signals in existence. The texture is so specific, so tied to one era, that you need nothing else for people to get it. Full crimped length for maximum commitment. Or just crimp the top section and leave the rest loose — that’s the half-up version and it’s very 1987.
What it needs: A crimping iron (very inexpensive — genuinely worth buying just for this), a scrunchie, and a side ponytail if you want to hit the full 80s bingo card. Temporary purple or hot-pink colour spray at the roots makes it completely unmissable. Side ponytail held with a neon scrunchie and you’re basically at the school dance from a John Hughes film.
Time: 20–30 minutes depending on hair thickness.
Getting it out: The crimped texture washes out with one shampoo. Use a good conditioner afterwards because the repeated small bends can leave hair feeling slightly dry. No lasting damage on healthy hair from one night of use.
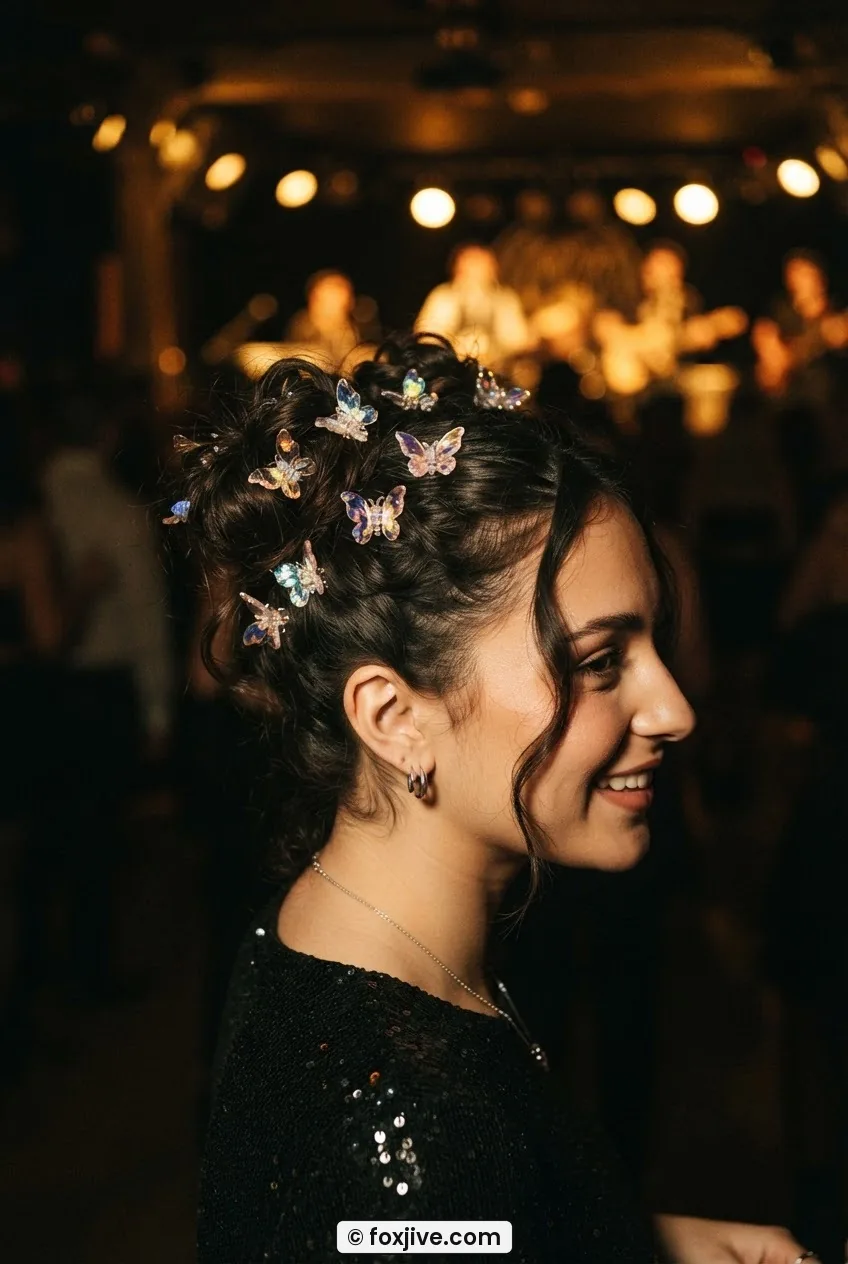
8. The Space Bun Pair — Y2K, reads from the back of a room
Era it signals: Late 1990s–Y2K. Think butterfly clips and platform trainers and that specific shade of frosty lip gloss.
Space buns are two high buns sitting on top of the head, and they are readable from the back of a very crowded room because the silhouette is so distinctive. Which is exactly what you want. This also happens to be one of the fastest halloween hairstyles on this list — if you can do a messy bun, you can do space buns in under ten minutes.
What it needs: Two hair elastics, a handful of bobby pins if your hair is slippery, and optional: butterfly clips scattered around the buns for maximum Y2K saturation. Iridescent clips. Tiny star pins. Glitter spray if you’re feeling generous with yourself. Easy halloween hair doesn’t get much easier than this.
Time: 8–12 minutes. I have done this in a car park before a Halloween party and I stand by that choice.
Getting it out: Remove elastics and clips, brush through, done. Zero product involved if you’ve kept it simple. Even with glitter spray, one shampoo clears everything.
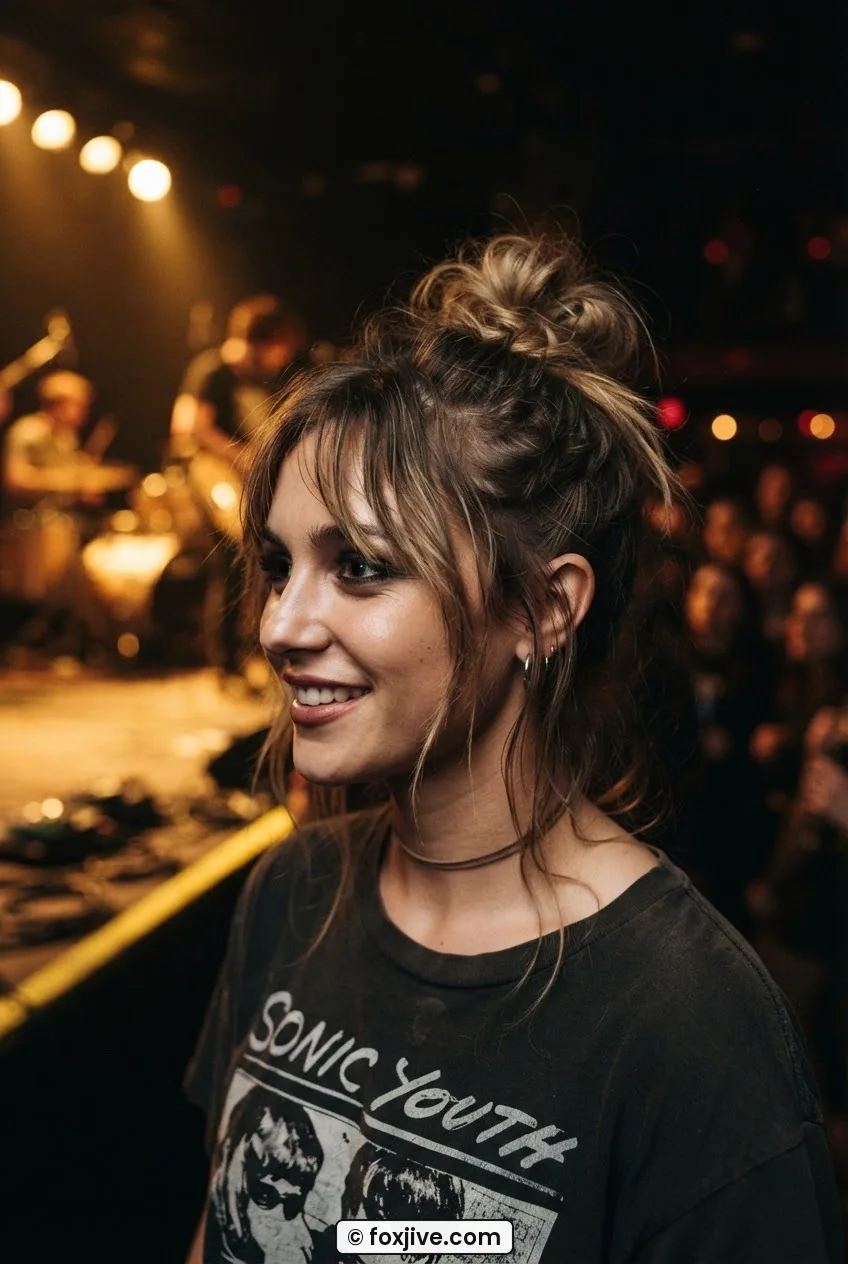
9. The Grunge Half-Up — 1990s in thirty seconds
Era it signals: Mid-1990s. Seattle. Messy, deliberate, not trying.
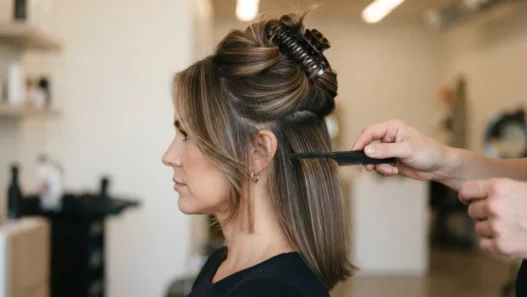
This is genuinely the easiest entry on this list. Pull the top half of your hair into a slightly off-centre, slightly too-loose bun or ponytail. Let a few pieces fall out. Use a plain elastic, not a decorated one. The messiness is the message. Pair it with dark eyeliner smudged outward and a flannel shirt and you’re done. The whole costume is communicating through deliberate non-effort, which is its own kind of skill.
What it needs: One hair elastic. That is it. If you want to push it further, a temporary dark rinse or a can of black hair spray at the roots gives an extra nineties edge — the grown-out dye look. But stripped back? Just the elastic, just the messiness. Simple halloween hairstyles don’t come more stripped back than this.
Time: 30 seconds. I am not exaggerating.
Getting it out: Remove the elastic. You’re already done.
10. The Pin Curl Set — 1940s texture that holds all night
Era it signals: 1940s. Glamour on a ration. Every wartime poster. The kind of woman who looked immaculate despite everything.
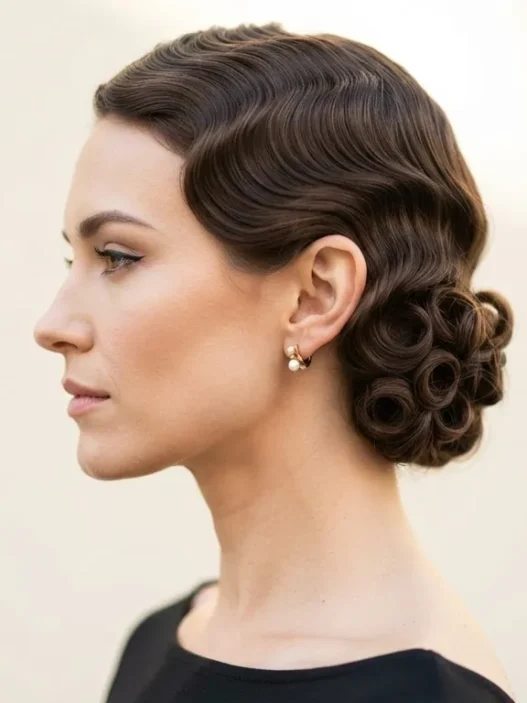
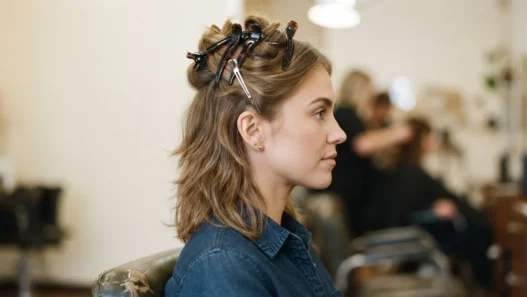
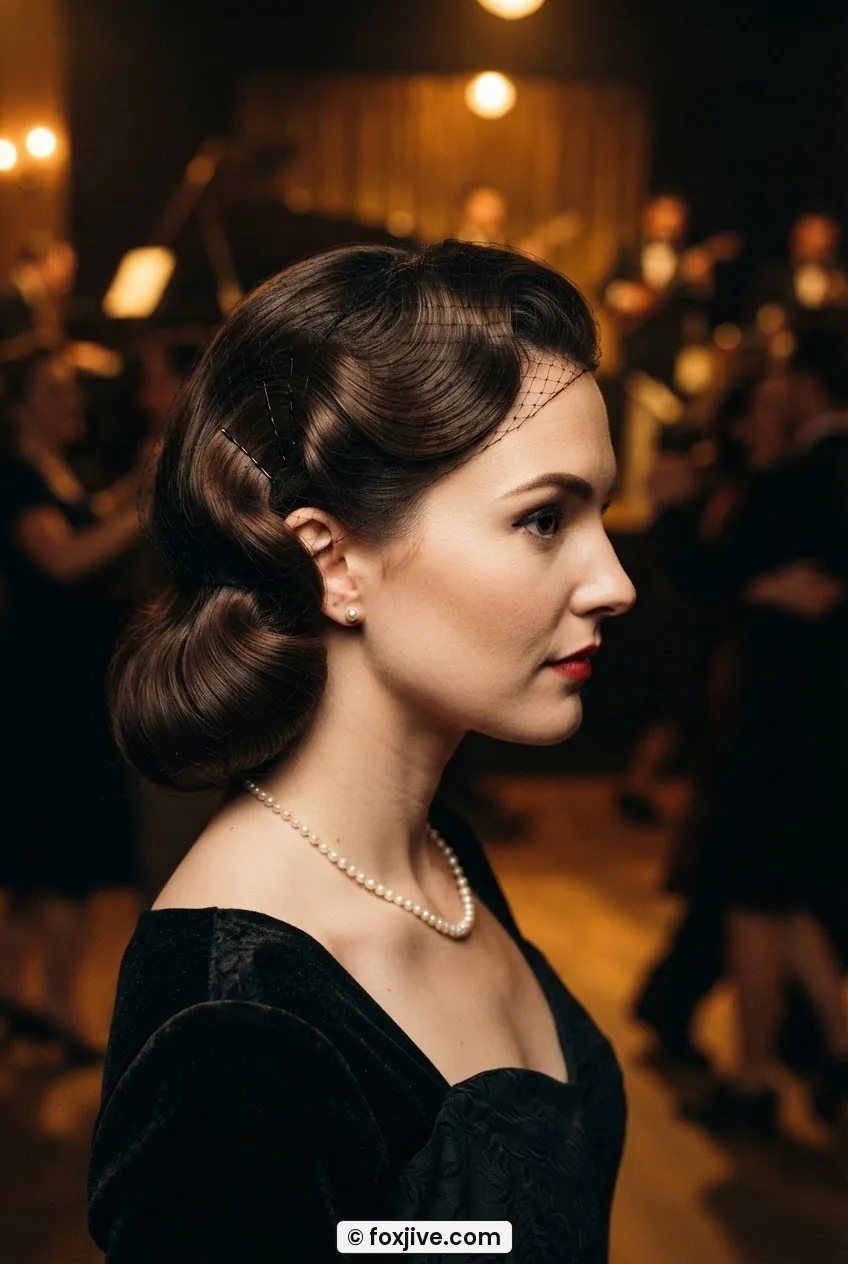
Pin curls are the original overnight set, but you can cheat the process completely by using a small-barrel curling wand and pinning each curl flat against your head while it cools. Give it five minutes, release, brush through gently, and you have a soft, bouncy 1940s texture that holds for hours without any additional product. The curls are rounder and more uniform than a modern wave — that’s what dates them so perfectly, in the best possible way.
She’s got the classic pin curl set in this photo and look at that texture — each curl slightly distinct but the overall effect is a smooth, coherent wave pattern. That’s the difference between a modern curl and a 1940s-style pin curl finish. The wave direction is intentional, not random.
What it needs: A small curling wand (3/4 inch to 1 inch barrel), pintail comb, bobby pins, and a light mist of flexible hold spray to set. A fine hair net over the set while it cools dramatically improves the result — they’re sold in drugstores for almost nothing.
Time: 30–40 minutes for the full set, plus 10 minutes cooling time.
Getting it out: Wash with warm water and conditioner. The curls fall out immediately. Pin curls leave hair with a pleasant soft texture the next day — one of those rare cases where Halloween is actually good for your hair.
11. The Poodle Ponytail — 1950s sweetness, surprisingly quick
Era it signals: 1950s. Soda fountain. School dance. Every teenage dream from that decade.
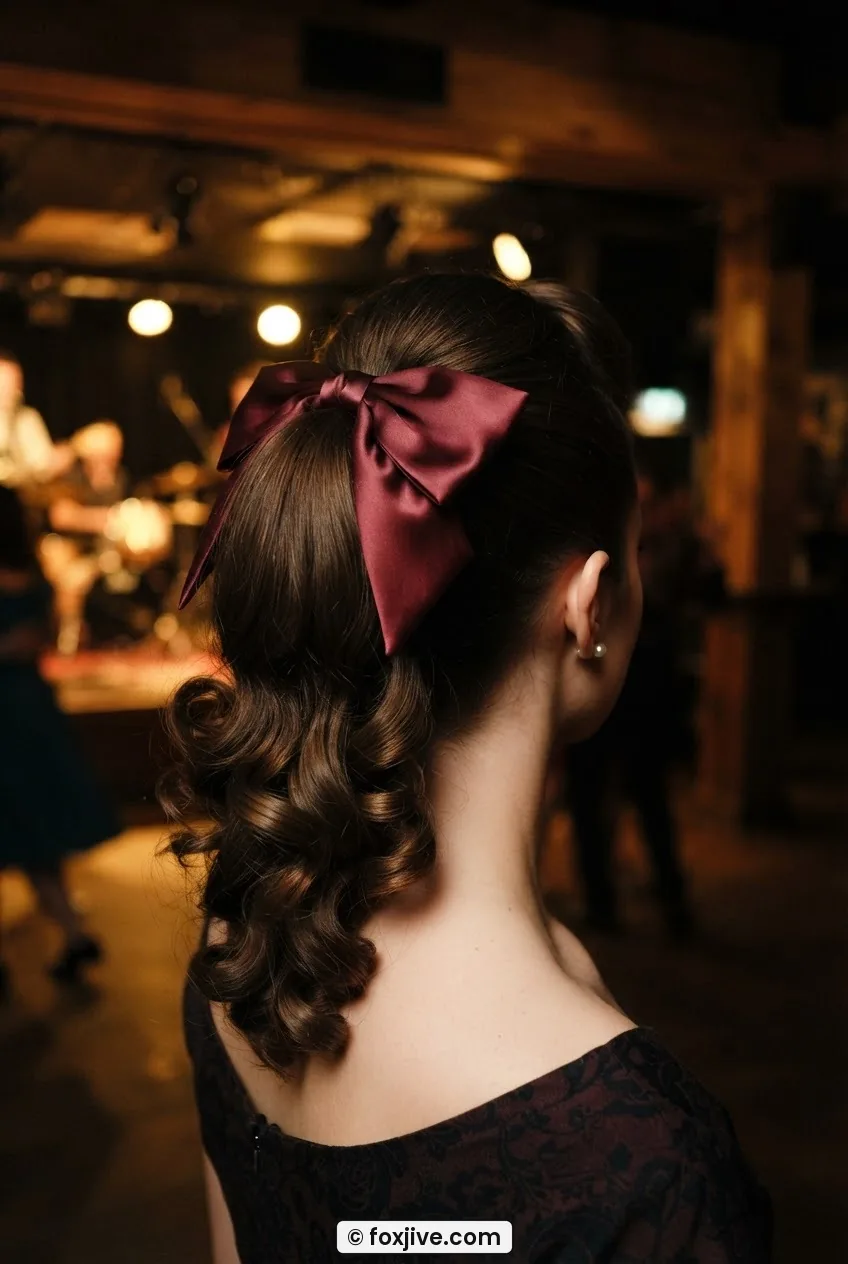
High ponytail, curled ends, a wide ribbon bow or a scarf tied around the base. That’s your costume. The key detail is the height — the ponytail sits very high on the head, not at the nape, and the ends are curled outward rather than under. It bounces when you walk and that’s the whole point. Pair with a circle skirt and ankle socks and you’re at a diner that closed in 1958.
What it needs: A hair elastic, a curling wand for the ends, a wide satin ribbon or printed scarf in a bright colour, and a single bobby pin to secure the bow. If you want the full poodle skirt effect, the hair is doing fifty percent of the visual work before you’ve even put the costume on. You can look into 1950s ponytail styling for more detail on getting that perfect curl direction.
Time: 15 minutes, including curling the ends. Fast.
Getting it out: Remove elastic and bow, wash out any finishing spray. The light curls at the ends relax overnight even without washing. Nothing to worry about here.
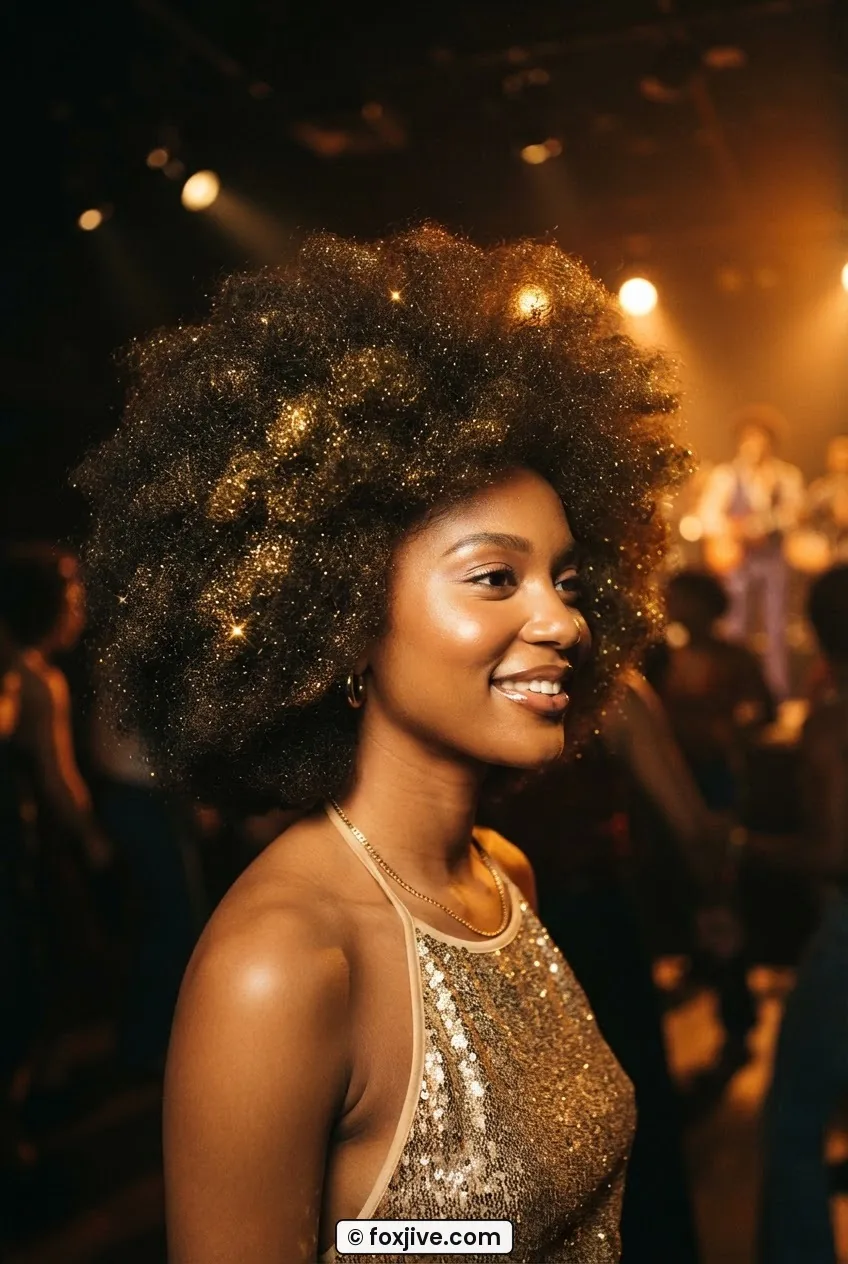
12. The Disco Puff — Saturday Night Fever, zero apology
Era it signals: Late 1970s disco. Mirror ball. White suit. Studio 54.
Big. Volumised. Lifted from root to tip. The disco puff is about maximum drama with a diffuser and a pick comb — if you have natural curl or wave, this look costs you almost nothing. If your hair is straight, foam rollers set overnight or a tight curl from a small wand, then picked out, get you there. The shape should be wide and proud, not contained. This is the opposite of a sleek look. Let it breathe.
What it needs: A diffuser attachment, curl-enhancing foam or mousse, a pick comb, and if you’re going full disco, gold shimmer spray all over the top layer. A gold lamé halter or a sequinned top and this is a complete costume. Hoop earrings as large as you own. No such thing as too large here.
Time: 20 minutes if you have natural curl. 35–40 minutes if you’re building curl from scratch.
Getting it out: Wash and condition as normal. Shimmer spray comes out in one wash. The picked-out curl style leaves no residue once you’ve rinsed the mousse. Your hair will actually feel quite good the next morning — diffusing is gentler than a blow-dry.
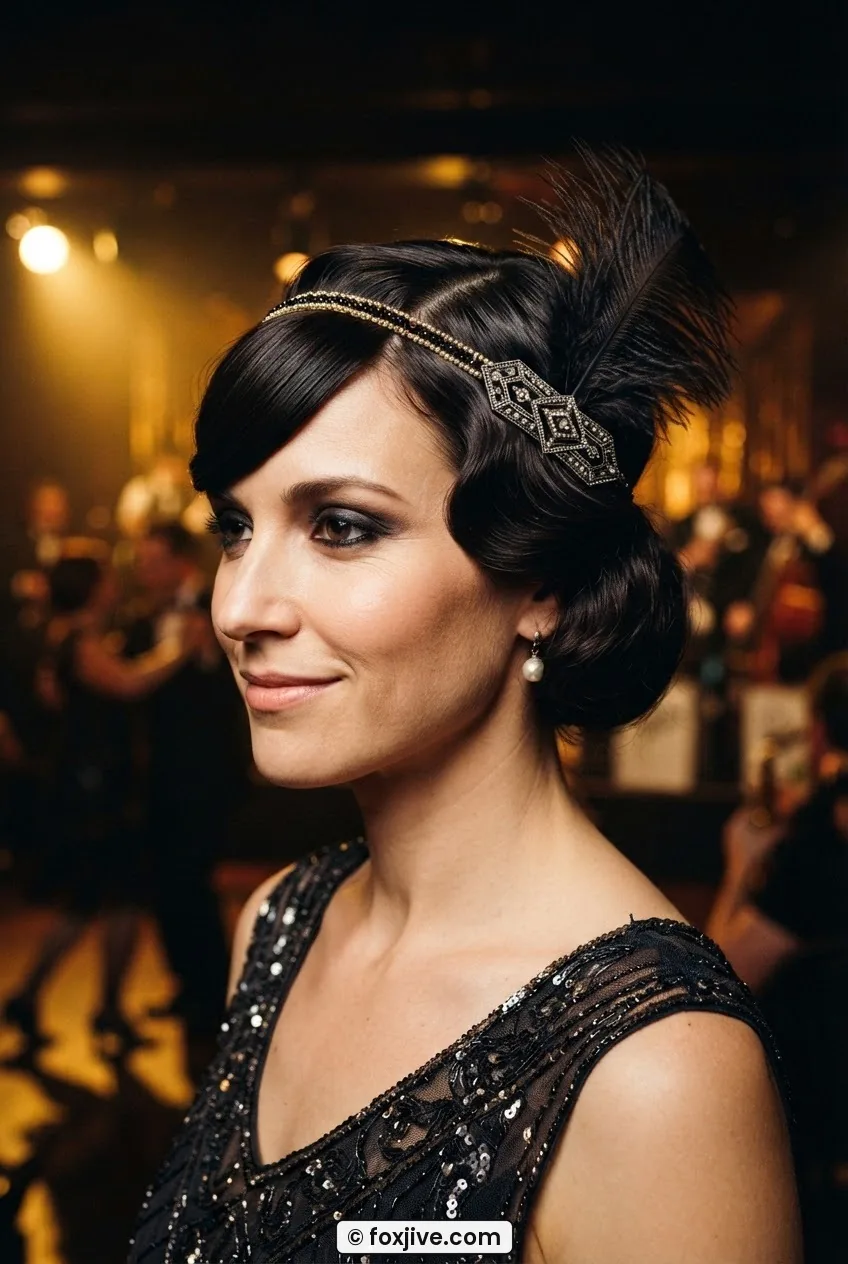
13. The Side-Swept Flapper Bob — 1920s, bangs included
Era it signals: 1920s. Speakeasy. Charleston. The woman who cut her hair and never looked back.
This one works beautifully for short hair — and it’s one of the best halloween hairstyles for short hair on this list because the bob length is already doing most of the character work. A deep side parting, the longer side smoothed across the forehead into a soft curtain bang, the shorter side pinned flat to the head with a jewelled clip or a barrette. Done. The 1920s are fully present in that silhouette.
For medium-length hair, you can fake the bob look by pinning the back hair under into a rolled tuck at the nape. From the front, it reads as a classic flapper bob. Genius workaround and it takes about seven minutes. I discovered this trick completely by accident the year I waited too long to book a haircut before Halloween and I’ve used it deliberately ever since.
What it needs: Strong-hold gel or pomade for the sleek sides, a jewelled clip or art deco barrette for the shorter side, and a headband with a feather or beaded detail if you want to push the full flapper aesthetic. A long string of pearls and a cigarette holder prop finish the look completely — though obviously just the hair communicates the era on its own.
Time: 10–15 minutes. One of the fastest decade-specific looks on this list.
Getting it out: Gel and pomade wash out in one shampoo. Remove the clip, wet your hair, done. If you’ve used a tuck-and-pin to fake the bob length, simply unpin and let the back fall down before you get in the shower.
Quick Answers Before You Get Started
Can I do these looks on very short hair — like a pixie cut?
A few of them work brilliantly. The finger wave was historically done on very short hair. The flapper bob (with its pinned-under-tuck trick) won’t help you much if your hair is already chin-length or shorter, but you’d naturally have the look already. The space buns and grunge half-up need at least enough length to gather — so if yours is true pixie length, lean into the finger wave, a sleek flat side parting with a bold accessory, or a heavily gelled flapper part instead.
Will hairspray damage my hair if I use a lot of it in one night?
One heavy night of hairspray use won’t damage healthy hair as long as you wash it out properly. The key is soaking the hair in warm water before you try to comb through it — fighting hairspray with a dry comb is what causes breakage, not the product itself. Use a generous amount of conditioner and let it sit for two minutes before rinsing.
Does temporary colour spray really come out in one wash?
The supermarket canned sprays — yes, generally one wash, sometimes two. The more pigmented glitter-style sprays occasionally need a second shampoo, especially on light blonde or platinum hair which can hold pigment slightly longer. Always do a patch test on a small hidden section a week before Halloween if you have colour-treated or bleached hair. And check reviews on washable Halloween hair colour for the brand you’re considering — quality varies a lot between products.
What’s the single best look for fine, flat hair that needs body?
The old Hollywood wave. The technique of setting the curl with a wand and then brushing through actually adds volume to fine hair rather than weighing it down. The asymmetric drape disguises any flatness at the crown beautifully. The bouffant is technically designed for volume but requires backcombing that can be hard to sustain on very fine hair through a whole evening. The Hollywood wave lasts better with less product. Trust me on this one.
Right, that’s the full thirteen. Pick your decade, pick your era, and — crucially — enjoy waking up the next morning with your own hair intact and no wig cap glue in sight. If you have questions about any of the techniques or want to tell me which one you went with, the contact page is always open. And if you’re curious about what this site covers in general, the about page will tell you more. Happy haunting.